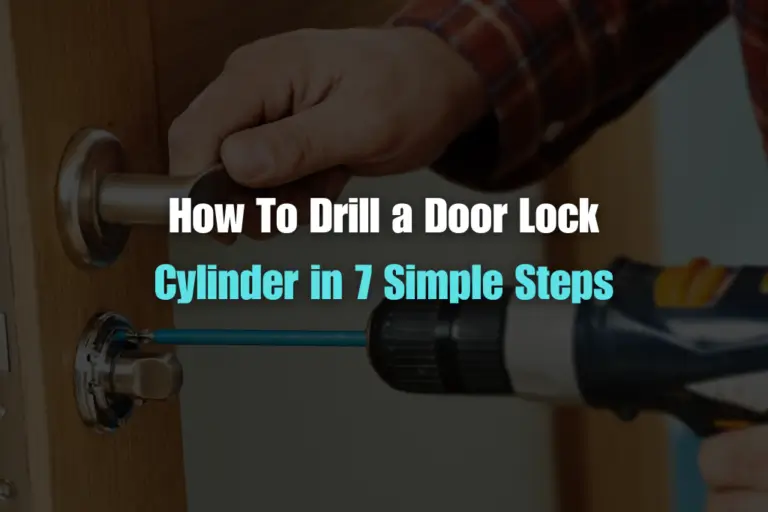
Ever found yourself locked out of your own home with no spare key in sight? Frustrating, isn’t it? Imagine standing at your front door, staring at a stubborn lock that just won’t budge. What if you could learn a simple yet effective technique to drill out that door lock in no time?
In this article, you’ll discover a step-by-step guide on how to drill out a door lock cylinder safely and efficiently when all else fails.
Understanding Door Lock Cylinder
Lock cylinders are essential for keeping your home safe. Knowing how they work can help you fix problems like getting locked out. Here are the main parts of a standard door lock cylinder.
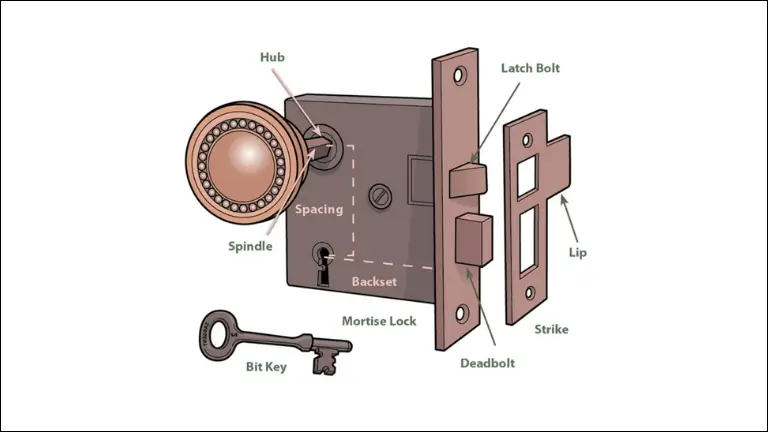
Keyway
This is the slot where you insert the key. Inside, there are pins and springs that align when you insert the correct key, allowing the lock to turn.
Cylinder
This is the part that houses the keyway. When you turn the key, the cylinder rotates and opens the lock.
Deadbolt
A strong bolt that goes into the door frame when locked, offers extra security. It’s usually controlled by a knob or key.
Latch
A spring-operated bolt that retracts when you turn the door handle, letting the door open. It automatically extends back into the door frame when you close the door.
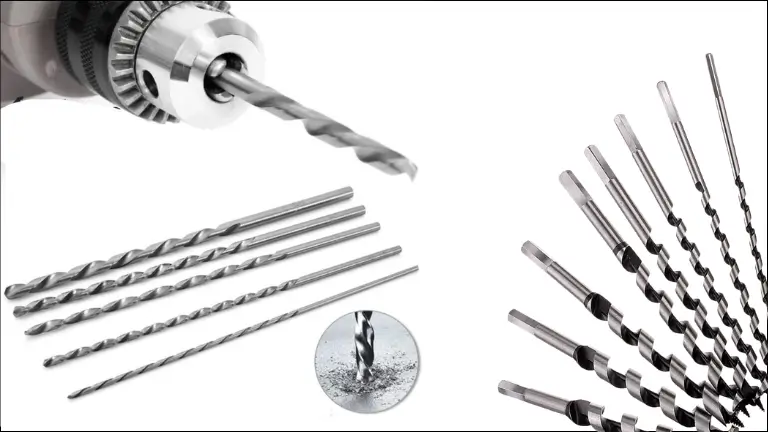
Tools Needed to Drill Out a Door Lock Cylinder
- Drill: A power drill is a must for this task.
- Drill Bits: You’ll need different sizes of drill bits to tackle the lock.
- Screwdriver: Useful for removing screws that hold the lock in place.
- Hammer: May be needed to help remove the lock after drilling.
- Protective Gear: Safety goggles and gloves to protect yourself.
- Replacement Lock: Have a new lock ready to install after removing the old one.
Having these tools ready will make the job smoother and faster.
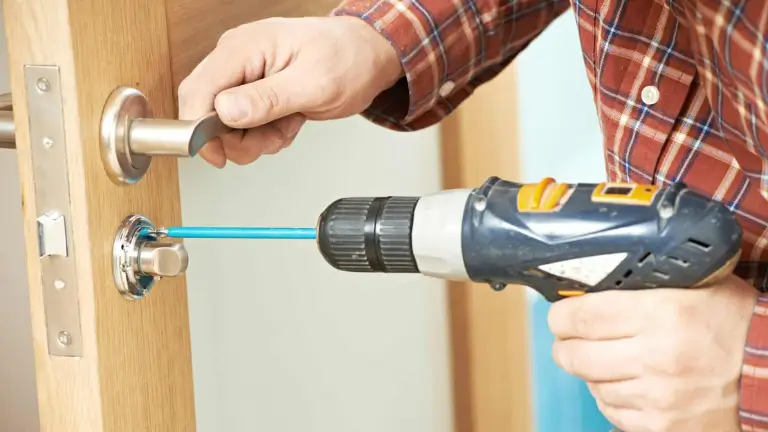
7 Simple Steps to Drill Out a Door Lock Cylinder
Make sure you have all the tools listed above. This ensures the process goes smoothly. Now let’s begin by learning how to drill out a door lock cylinder.:
Step 1 – Secure the Door
Ensure the door is stable and won’t move while you’re drilling. Use a doorstop or have someone hold it steady. A stable door ensures you drill accurately and safely.
Step 2 – Insert the Drill Bit
Choose a small drill bit to start, such as a 1/8-inch bit. Insert it into your drill and tighten it securely. This small bit will help you create a pilot hole, which makes it easier to drill with larger bits later.
Step 3 – Drill the Pilot Hole
- Position the Drill: Hold the drill perpendicular to the lock’s keyhole. This helps ensure that the hole is straight and centered.
- Start Drilling: Begin drilling slowly to avoid slipping. Apply steady pressure but don’t force the drill.
- Depth: Drill about half an inch into the lock. This pilot hole will guide the larger drill bit.
Step 4 – Switch to a Larger Drill Bit
Once the pilot hole is done, switch to a larger drill bit, such as a 1/4-inch bit.
- Insert the New Bit: Remove the small bit and insert the larger one into the drill. Tighten it securely.
- Drill the Cylinder: Align the drill bit with the pilot hole and start drilling. Apply steady pressure and drill deeper into the lock cylinder.
Step 5 – Stop and Check Progress
Periodically stop drilling to check your progress. Make sure you’re not drilling too far and damaging the door. Check if you can see the internal pins breaking apart.
Step 6 – Drill Deeper if Necessary
If the lock still isn’t budging, switch to an even larger drill bit, such as a 3/8 inch bit, and repeat the process. This should break apart the remaining pins and internal components of the lock.
Step 7 – Remove the Lock Cylinder
Once you’ve drilled deep enough, the lock cylinder should be loose.
- Use a Screwdriver: Insert a flathead screwdriver into the keyhole and try to turn the lock. If it turns, the cylinder is broken and you can unlock the door.
- Use Pliers: If the lock doesn’t turn, use needle-nose pliers to pull out the broken pieces of the cylinder.
Things To Keep In Mind Before Drill Out a Door Lock Cylinder
Before drilling out a door lock cylinder, consider these factors for a safe and smooth process:
First, determine if drilling is truly necessary. Exhaust all other options like using a spare key, lock picking, or calling a locksmith. Identify the type of lock, as high-security locks can be harder to drill. Gather necessary tools: a drill, drill bits, screwdriver, hammer, protective gear (safety glasses, gloves, face mask), and a replacement lock. High-quality tools ensure efficiency and safety.
Always wear protective gear. Make sure your workspace is well-ventilated and clear of obstacles, and stabilize the door to prevent movement during drilling. Understand the lock mechanism, including the keyway, cylinder, deadbolt, and latch. Focus on the lock’s weak points, typically the pins inside the cylinder.
Plan the drilling process. Start with a small drill bit to create a pilot hole, then use larger bits. Keep a steady hand and check your progress periodically to avoid over-drilling. Prepare for post-drilling. Have a new lock ready to install immediately and clean up metal shavings and debris to ensure safety. Finally, consider the cost and potential damage to the door. Weigh the cost of drilling and replacing the lock against hiring a professional locksmith.
By keeping these factors in mind, you can drill out a door lock cylinder safely and effectively.
After Drill Out a Door Lock Cylinder Consideration
Replacement Lock
Have a replacement lock ready to install immediately after drilling out the old one. This ensures your property remains secure.
Clean Up
Prepare to clean up the metal shavings and debris generated during drilling. Proper disposal is important for safety and cleanliness.
Cost
Consider the cost of drilling out the lock versus calling a professional locksmith. Sometimes, the cost of replacing the lock and the potential damage can be more than hiring a locksmith.
Impact on the Door
Be mindful of the potential damage to the door itself. Drilling improperly can cause significant damage to the door, frame, and surrounding area.
By keeping these considerations in mind, you’ll be better prepared to drill out a door lock cylinder safely and effectively. Always prioritize safety, legal aspects, and the proper use of tools to ensure the process is successful and hassle-free.
Conclusion
You’ve now learned the steps and tools needed to drill out a door lock cylinder. By following this guide, you can handle this task with confidence. Remember to always prioritize safety by wearing protective gear and using tools correctly. With patience and attention to detail, you can drill out a door lock cylinder without causing damage. Now you’re ready to take on this challenge with ease.